- info@500tech.com
- HaYetsira 19, Ramat Gan
Quick Add React Component to Webstorm
Boris Dinkevich
Last updated on Jul 15, 2016
One of the better practices in React is breaking our view to as many reusable components as possible. To make the test a bit easier, we can set WebStorm to auto generate React Component files.

Setup
- Open WebStorm
- Click Ctrl+Enter
- Select "Edit File Template"
- Click green + on left top
- Name it "React Component"
- Set extension to: "js" (or "jsx")
- Click "enable live templates"
- Paste this to main edit view:
#set ($clean = ${StringUtils.sub(${NAME}, "_", "-")})
#set ($component = ${StringUtils.removeAndHump(${clean}, "-")})

const $component = () => (
  #[[$END$]]#
);

export default $component;
Usage
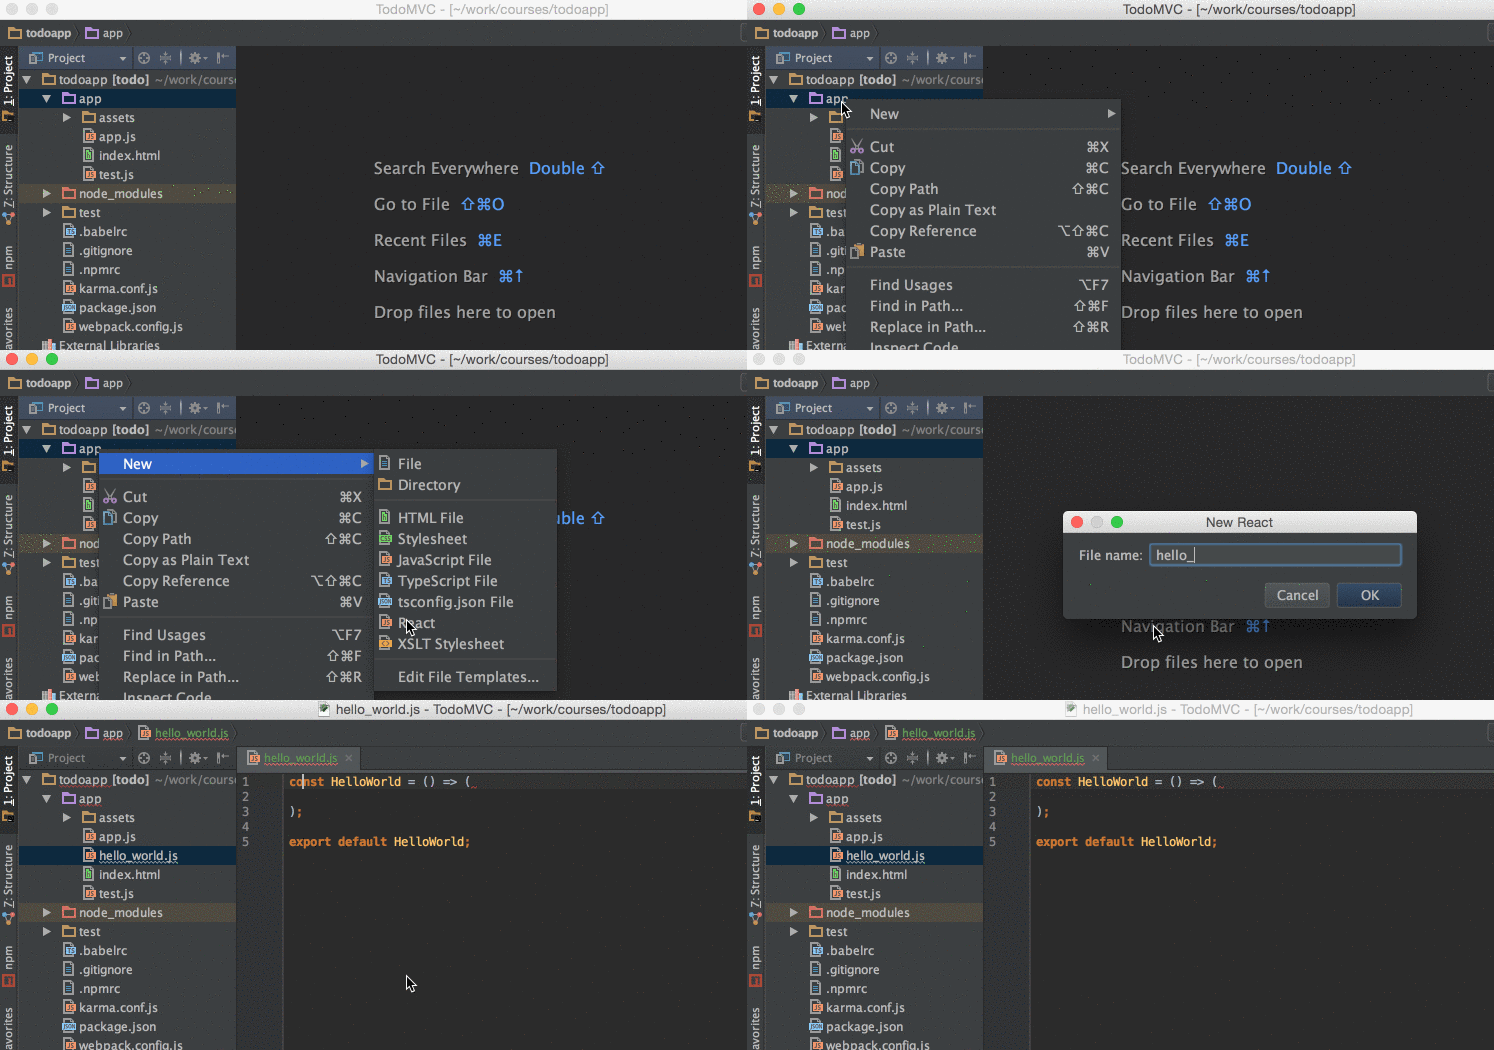
Anywhere in WebStorm where file adding dialog pops-up (e.g. Ctrl+Enter) you can now select "React Component"
Set the name of the file (both "-" and "_" are supported) and viola - a new Dumb ReactJS ES2015 compatible component is created.
const HelloWorld = () => (
  <h1>Hi</h1>
);

export default HelloWorld;
Summary
This is just a small taste of what WebStorm's file creation and Live Templates can do. Do explore more.
© 500Tech. Building high-quality software since 2012.
- info@500tech.com
- HaYetsira 19, Ramat Gan
