- info@500tech.com
- HaYetsira 19, Ramat Gan
We’ll begin by installing the react-vr-cli.
npm install -g react-vr-cliNext, we are going to initialize the project. This will install all of the dependancies that we need to run the project.
react-vr init WelcomeToVR
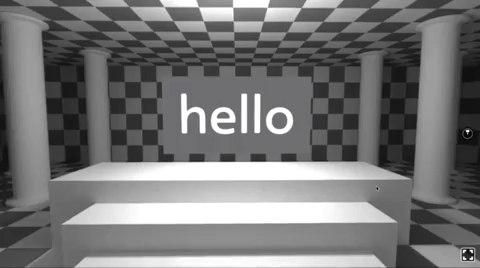
cd WelcomeToVR && npm startFacebook already created a very basic ‘hello world’ project which they call welcome to VR. After installation you should see the following screen:
After the init we get the following file structure:
__tests__
node_modules
static_assets
vr
  index.html
  client.js
index.vr.js
All the static assets are located in the static_assets folder. The entry point for any VR application is the index.vr.js file. In the VR folder there is always a file called client.js which is used for the application configuration and communicating with the Three.js scene.
Let’s take a look at index.vr.js. This is the entry point for our application. We have a basic React component that contains two children: Pano for the panoramic image of the room and Text for the word "hello". On the bottom we register the WelcomeToVr component just like in React.
import React from 'react'
import { AppRegistry, asset, Pano, Text, View } from 'react-vr'
class WelcomeToVR extends React.Component {
render() {
return (
<View>
<Pano source={asset('chess-world.jpg')} />
<Text
style={{
fontSize: 0.8,
textAlign: 'center',
transform: [{ translate: [0, 0, -3] }],
}}>
hello
</Text>
</View>
)
}
}
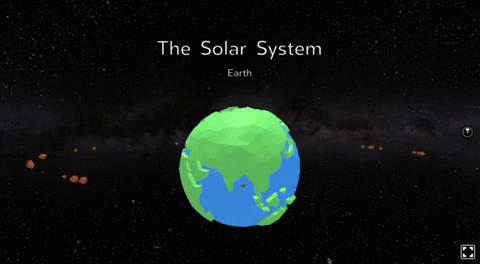
AppRegistry.registerComponent('WelcomeToVR', () => WelcomeToVR)Let's begin building our own application. The app that we are going to build together will represent our solar system planets.
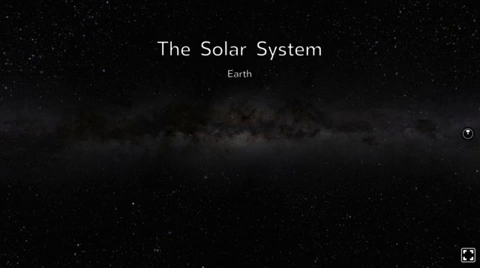
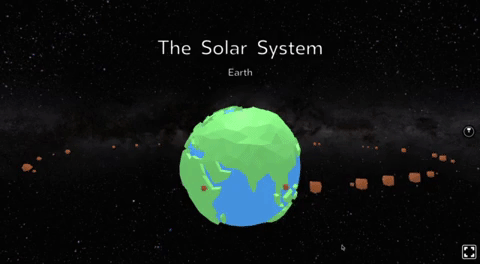
This is what the application is going to look like. We can see a planet with some text, there is a menu on the right to change a planet, and some additional info about the planet on our left.
3D coordinates and Transformations
To know where to place objects and how to move around the scene we need to be familiar with the coordinate system.

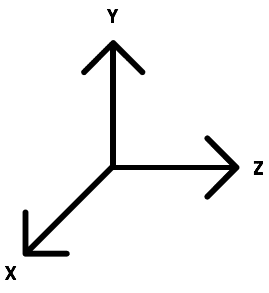
The coordinate system is the same as OpenGL coordinates meaning that y positive is up, and we use the right hand rule for rotation.
We can apply transformations on any component, just like we do with CSS The syntax is a bit different than classic CSS but should be familiar to those who code in React Native. If I want to place an object anywhere other than [0,0,0] I use translate. If I want to change its size I use scale. And if I want to rotate it along a certain axis I use rotate.
Just like React Native, React VR provides a set of basic primitives used to construct user interface. This is a powerful feature of React VR: developers can use the same styling and layout system across web, React Native, and VR, which opens the doors to directly sharing layout styles across these platforms.
View is the most fundamental component for building a UI. It is a container that supports layout with flexbox, styling, and touch handling. View maps directly to the native view equivalent on whatever platform React Native is running on, whether that is a UIView, <div>, or android.view. View is designed to be nested inside other views and can have zero to many children of any type.
Text is a React component for displaying text. It supports nesting and styling.
Image is a react component for displaying different types of images. Keep in mind that you must manually specify the dimensions of your image in meters and it is not possible to predict the intended dimensions from the pixel width and height of the image.
Pano is an image projected onto a sphere that fully surrounds the viewer. It is a Sphere of 1000m with a center located at the local transform origin at [0,0,0]. You can create pano compatible images by using a special 360 camera or even with your phone. Cube map images are also supported in Pano, you can specify a source url as an array of 6 individual images.
So lets add a Pano component to our index.vr.js, we need to provide an asset to the source property.

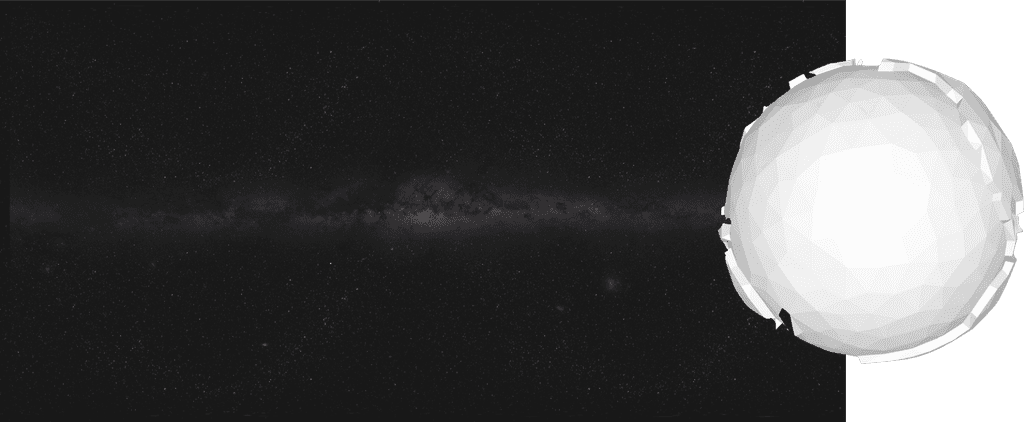
Note that we are using a utility from react VR called asset. This allows us to load assets directly from the static_assets folder I showed you before. Also note that this is not just any jpeg but rather one that supports 3D.
render() {
return (
<View>
<Pano source={asset('stars.jpg')}/>
</View>
);
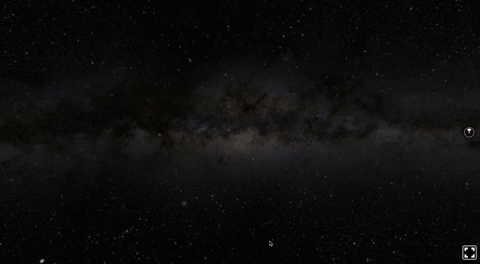
}This is the result, our sphere is the cosmos. The image surrounds us.
Styling with Flex box
React VR makes use of a Flexbox style layout algorithm to automatically position components and their children. The library used is CSSLayout, the syntax is more or less identical to the web flexbox.
As you can imagine, using flexbox to layout content on a 2D plane is not optimal for a 3D experience. So it’s a common practice to layout the content on a cylindrical plane. This will give us a ‘2.5D’ feel.
Interactions
In VR we interact with objects in a different way than the web. We don’t necessarily click on something, it may be enough that we look at an object for a significant amount of time to trigger an event.
Besides looking we can also press a controller to trigger a reaction.

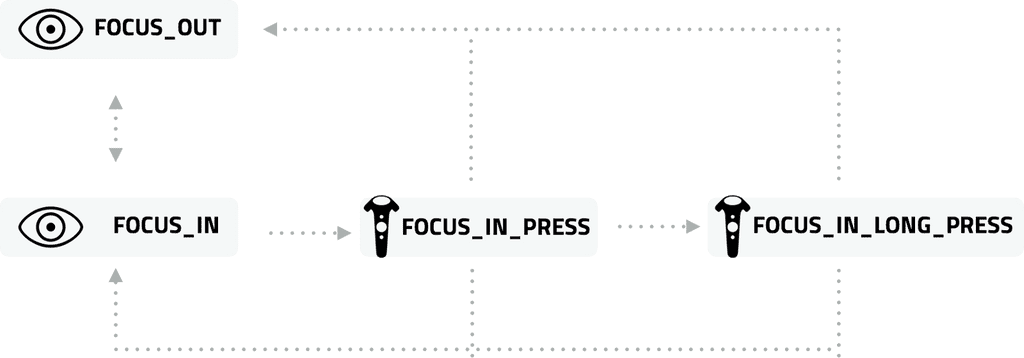
To make our scene interactive we are going to use react’s VrButton — a helper component that manages the interaction state machine. By default, VrButton has no appearance and will only act as a wrapper to capture events, but it can be styled in the same ways as a View.
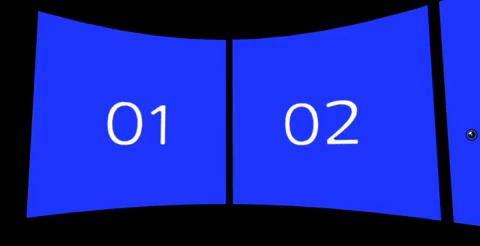
When pressing a button in our menu, the handleClick function will save the planet name in the currentPlanet variable.
menu() {
  return (
    <View
      billboarding={'on'}
      style={styles.menu}>
        {
          Object.keys(planets).map((planet) => (
            <VrButton key={`button-${planet}`}
              onClick={() => this.handleClick(planet)}>
              <View style={styles.planetBtn}>
                <Text style={styles.planetBtnLabel}>{planet}</Text>
              </View>
            </VrButton>
          ))
        }
    </View>
  );
}
Let’s take a look at our menu again. Now when we press a button we are updating the currentPlanet variable in our state, and as a result the header component updates.
Loading models
There are many types of model formats available out there like obj, stl, or collada. They may come with a built-in animation, or with material and texture. At the moment, React VR supports the Wavefront OBJ file format only.
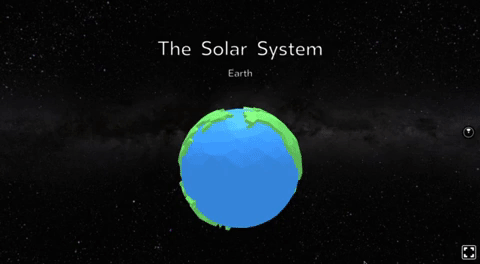
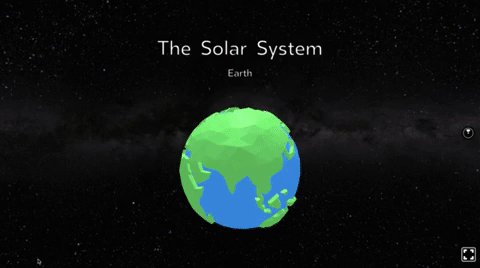
React VR provides a component for loading models, called Model. Let’s load Earth.
Here is our planet declaration. The lit property specifies if the model will be affected by lights. The model’s ability to define a style enables us to apply different transformations such as scaling, rotating, or translating.
<Model
  source={{ obj: asset(`models/Earth.obj`) }}
  texture={asset(`textures/Earth.png`)}
  lit={true}
  style={styles.planet}
/>
Here is the loaded model. By changing the current planet we’re causing a new model to load every time.
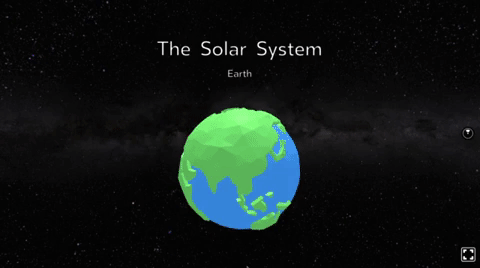
Animations
To make our scene more interesting we can add animation to objects and layouts. There are two ways to create animations in React VR : using the Animated library, or manually using requestAnimationFrame.
Below is an example of requestAnimationFrame . What I want to do here is rotate a planet. The rotate function in this example is called in a loop hopefully at least 60 frames per second. On each call we are advancing the rotation by a delta.
state = {
  rotation: 0
};

componentDidMount() { this.rotate(); }

// planet rotate animation
rotate() {
  const now = Date.now();
  const delta = now - this.lastUpdate;

  this.time++;

  this.lastUpdate = now;
  this.setState({
    rotation: this.state.rotation + delta / 150
  });
  this.frameHandle = requestAnimationFrame(this.rotate);
}
This is the result, we can see the planet rotating. If we switch planets the new model will still rotate around itself.
Lets see an example of how to use the Animated library for animations. When a button is pressed we want to make it look like it bounces a bit, and also when a planet appears we will give it a nice little bounce. In the Animated library this effect is called spring.
state = {
  bounceValue: new Animated.Value(1)
};

// bounce animation
bounce({initial, toValue, friction = 1.5}) {
  value.setValue(initial);

  Animated.spring(
    this.state.bounceValue,
    {toValue, friction}
  ).start();
}
Native modules
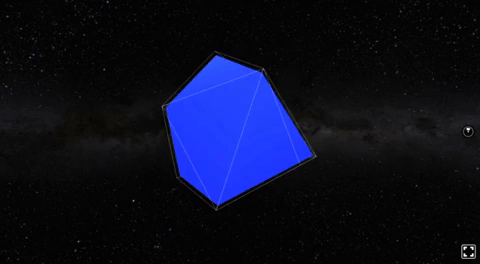
If React VR doesn’t support a feature that you need, you can build it yourself using native modules.
A lot of stuff that exists in Three.js has not yet been implemented in React VR, for example there are dozens of geometries in Three.js of which only sphere, box and cylinder exist in React VR.
This Tetrahedron geometry is supported in Three.js but not in React VR. So lets create a native module, let’s extend it for React.


I need to do 2 things . First I create a module and in its constructor which I receive the Three.js scene. From this point the Three.js scene is open to me.
The rows within the add functions are all Three.js code. I define a tetrahedron geometry, a meshLambert material and a new mesh that I’m adding to the actual Three.js scene.
import { Module } from 'react-vr-web'
import * as THREE from 'three'

export default class AsteroidsModule extends Module {
  constructor(scene) {
    // The name of the module in NativeModules
    super('Asteroids')

    this.scene = scene
  }

  add() {
    const color = 0x7f492a
    const geometry = new THREE.TetrahedronGeometry(10, 1)
    const material = new THREE.MeshLambertMaterial({ color })
    const mesh = new THREE.Mesh(geometry, material)

    this.scene.add(mesh)
  }
}
The second thing I have to do is go to my client.js file, and place my native module in the native modules array. I also make sure that my module is rendered.
import { VRInstance } from 'react-vr-web'
import AsteroidsModule from '../asteroidsModule'
import * as THREE from 'three'

function init(bundle, parent, options) {
  const scene = new THREE.Scene()
  const Asteroids = new AsteroidsModule(scene)
  const vr = new VRInstance(bundle, 'solarSystem', parent, {
    // Add custom options here
    nativeModules: [Asteroids],
    scene,
    ...options,
  })

  vr.render = function() {
    Asteroids.render()
  }

  // Begin the animation loop
  vr.start()

  return vr
}
Here is my tetrahedron geometry in react VR. These tetrahedrons are going to be my asteroids.
Here is the final application: we are inside a Pano where we loaded an image of stars. We see the header with two texts inside. Below is a loaded model, the planet surrounded by asteroids that we created by using native modules.
On the right is a Menu, a click on the menu switches to a different planet with a bounce. The menu button also has a spring to it. On the left we have an info view. Both the menu and the info have a billboard property that is on and as a result those views always face us.
You can find the entire project on GitHub. Feel free to use it.
React VR is relatively new, time will tell if the community is willing to adopt it. React VR is a quick and easy way to build a 3D application. I'll be happy if you share your future applications and insights with me.
Thanks for your time!
- info@500tech.com
- HaYetsira 19, Ramat Gan